Tiki Hut Décor Guide: Natural Textures, Lighting Accents & Tropical Finishes
Disclosure: Some links below are affiliate links. If you purchase through them, a small commission may be earned at no extra cost to you.
Décor is how a tiki hut gains personality—texture on posts, warm pools of light, plants that soften edges, and a few focal
pieces that make the space yours. Below is a long-form, field-tested guide: palettes, materials, where to mount things, and
links to outdoor-rated items that hold up around salt, wind and humidity.
Quick Navigation
- Design Principles (palette, scale, repetition, layers)
- Easy Themes (classic tiki, coastal, jungle-lounge)
- Bamboo, Thatch Edges & Reed Panels
- Rope Wraps, Nets & Discreet Hardware
- Wall & Beam Décor (signs, paddles, masks)
- Lanterns & Ambient Lights
- Planters, Privacy Screens & Greenery
- Tabletop & Bar Accessories
- Rugs, Throws & Soft Goods
- Outdoor Art & Sculptures
- Seasonal Switch-Outs & Storage
- Budget Upgrades vs. Splurges
- Common Mistakes (and easy fixes)
- Mini Install Recipes
- Mounting & Care (outdoor fasteners)
- Ready-to-Shop Links
- Printable Checklist
Design Principles (Palette, Scale, Repetition, Layers)
- Palette: Start with three base colors from the structure—thatch tan, post brown, palm green. Add one accent (lagoon blue, coral, or deep teal).
- Scale: Choose fewer, larger pieces (24–36″ wall art, 12–16″ planters) over many tiny knick-knacks.
- Repetition: Repeat materials (bamboo, rope, rattan) two or three times so the look reads intentional.
- Layers: Combine hard textures (bamboo, metal) with soft ones (rugs, throws) and organic greens for depth.
- Sightlines: Keep the ridge open for airflow; decorate beams, posts and the bar back—perimeter first, center last.
Easy Themes (that don’t box you in)
- Classic tiki: Bamboo trim, carved masks, warm lanterns, woven mats.
- Coastal: Driftwood, rope, oars, light canvas textiles, blue/white palette.
- Jungle-lounge: Bigger leaf plants, darker wood accents, brass or black hardware, rattan lanterns.
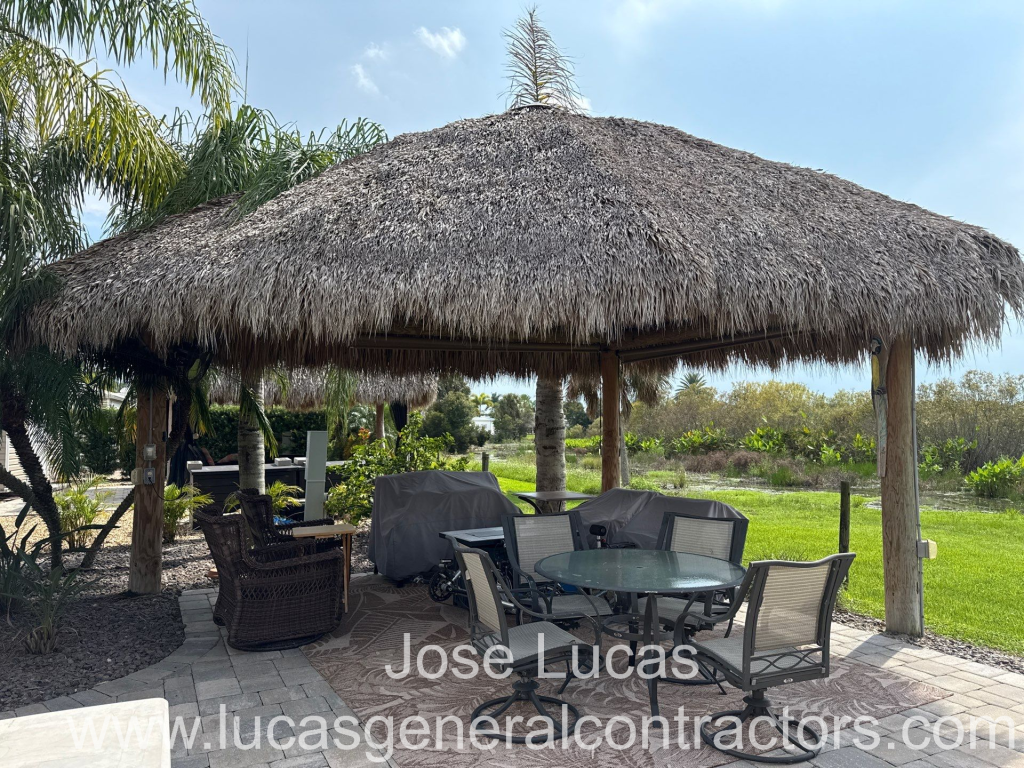
Bamboo, Thatch Edges & Reed Panels
Natural textures are the fastest upgrade. Use them where hands won’t snag and water drains freely.
- Bamboo poles: 1–2″ for trim; 3–4″ for bold accents. Great at post bases and bar faces.
- Bamboo matting/slats: Staple to a plywood liner on the bar back or console fronts.
- Reed fencing: Lightweight screening to hide utilities or add texture along the windward edge.
- Thatch edging: A short fringe under the eave adds depth—keep clear of lights and fan blades.
Rope Wraps, Nets & Discreet Hardware
Rope softens transitions and protects high-touch areas. Manila looks classic; “poly manila” sheds less and lasts longer.
- Sizes: 1/2″ for trim lines, 3/4–1″ for post wraps or rail accents.
- Finishes: Heat-shrink, whipping twine or brass rope clamps for clean ends.
- Nets: A small fishnet across a beam adds texture—keep clear of fans/lights.
- Clips: Stainless eye straps and P-clamps make neat attachment points without bulky brackets.
Wall & Beam Décor (Signs, Paddles, Masks)
Pick one focal zone (usually the bar back or a beam opposite the entry) and keep other faces simple. Larger pieces read better outdoors.
- Signs: Sealed wood or powder-coated metal; pre-seal edges against moisture wicking.
- Paddles/Oars: Horizontal over a console, or a vertical pair to frame the bar back.
- Masks/Carvings: Mount with hidden screws; add a felt pad to prevent rattling in wind.
- Small utility: Stainless bottle opener and towel hook at the bar end post.
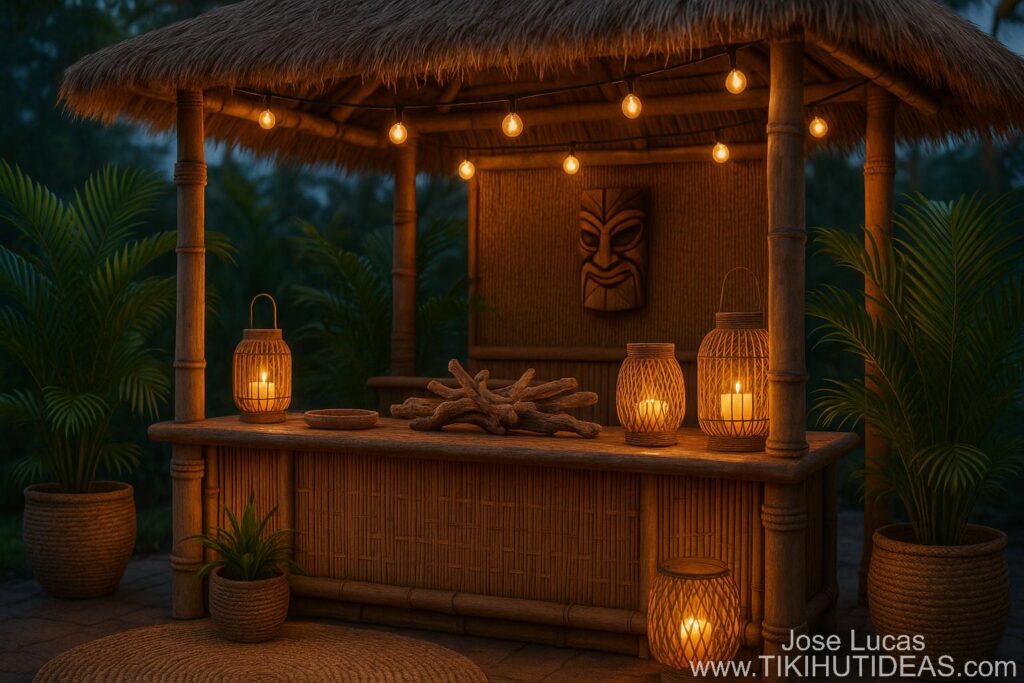
Lanterns & Ambient Lights
Layer warm light: a beam line of string lights, then lanterns for glow. Keep heat away from the roof; use LED candles.
- String lights: 2700–3000K LEDs. Clip to beams with stainless/UV clips; never staple through wire.
- Lanterns: Rattan or metal, battery-timed; hang from small hooks or place on consoles.
- Path/step lights: Guide guests to and from the hut along the landscape edge.
Planters, Privacy Screens & Greenery
Green softens posts and filters wind. Use planters to step the hut into the yard without building walls.
- Planters: Fiberglass or resin (light, durable). Group in threes; vary heights.
- Privacy: Faux hedge panels for instant screening, or living clumping bamboo in planters.
- Hanging baskets: Mount at beam corners; keep drip trays small to avoid puddles.
- Low-mess tropicals: Areca palm, dwarf schefflera, philodendron selloum—sturdy leaves, easy cleanup.
Tabletop & Bar Accessories
Keep surfaces clean and the bar organized with a few workhorse pieces.
- Bar caddy: Holds napkins, straws, openers; resin or stainless.
- Rattan tray: Carries snacks from the kitchen; doubles as centerpiece base.
- Stemware rack: Under-shelf mount frees counter space.
- Woven placemats: Wipe-clean vinyl; protects table tops.
Rugs, Throws & Soft Goods
Soft goods warm the space and reduce echo. Use hose-off materials and zippered covers.
- Rugs: Polypropylene, flat-weave; size so front chair legs sit on the rug.
- Throws: Light acrylic knits for breezy nights; store in a lidded basket.
- Pillows: Solution-dyed fabrics with vented inserts; add ties on windward edges.
Outdoor Art & Sculptures
One or two sculptural pieces ground the space—a carved stool, a small stone figure in the planter line, or a driftwood centerpiece.
Seasonal Switch-Outs & Storage
- Keep a small tote with spare LED candles, batteries, and clips for quick resets after storms.
- Rotate pillow covers by season; store the off-set in a deck box with silica gel packs.
- For big winds, remove lanterns and hangings; coil rope wraps and nets into the deck box.
Budget Upgrades vs. Splurges
- Budget: Rope wraps, one statement sign, two lanterns, reed panel behind the bar.
- Mid: Bamboo matting on bar face, planter trio with privacy panel, string lights + dimmer.
- Splurge: Carved pieces, custom metal sign, in-ground planter line with landscape lighting.
Common Mistakes (and Easy Fixes)
- Too many small items: Curate. Keep a few strong pieces; store the rest.
- Decor in airflow paths: Move hangings away from the ridge and fan sweep.
- Unsealed edges: Seal raw sign edges and bamboo cuts to prevent wicking.
- Heat near thatch: Use LEDs and enclosed lanterns; no open flame under the roof.
Mini Install Recipes
- Bar-Back Refresh (one hour): Cut reed panel to size, attach with stainless staples to a plywood liner, add a metal sign centered, finish with a rattan tray and two lanterns.
- Post Base Upgrade: Wrap bottom 24″ with 1″ rope; finish ends with clamps; add a small planter triangle at the base.
- Entry Focal: Mount a paddle pair crossing above the console; hang an LED lantern below; place a driftwood piece on the console.
Mounting & Care (Outdoor Fasteners)
- Fasteners: Stainless screws, galvanized staples, UV zip ties, and stainless P-clamps. Avoid bare steel in salt air.
- Adhesives: If needed, use exterior construction adhesive on wood backers—not on thatch.
- Quarterly rinse: Hose and soft brush to remove salt film from bamboo/rope; allow to dry in the breeze.
Ready-to-Shop Links
- Bamboo poles
- Bamboo matting / slats
- Reed fencing
- Thatch edging
- Manila / poly-manila rope
- Decorative nets
- Stainless eye straps / clamps
- Outdoor bar signs
- Decorative oars
- Carved masks
- Warm LED string lights
- Rattan / metal lanterns
- Solar path lights
- Fiberglass planters
- Privacy hedge panels
- Bar caddies & trays
- Under-shelf stemware racks
- Outdoor rugs
- Weather-resistant pillows
- Stainless bottle openers & hooks
Tip: Order a small hardware bundle (stainless screws, UV zip ties, P-clamps) with your décor—install goes faster when everything is on hand.
Printable Checklist
- Pick palette (3 base + 1 accent) and theme.
- Choose one focal wall/beam; keep ridge clear.
- Order: bamboo/rope, a focal sign, two lanterns, planter trio, and one soft layer (rug or throws).
- Add mounting kit: stainless screws, UV zip ties, P-clamps, small hooks.
- Plan seasonal storage (deck box) and quick storm take-down.
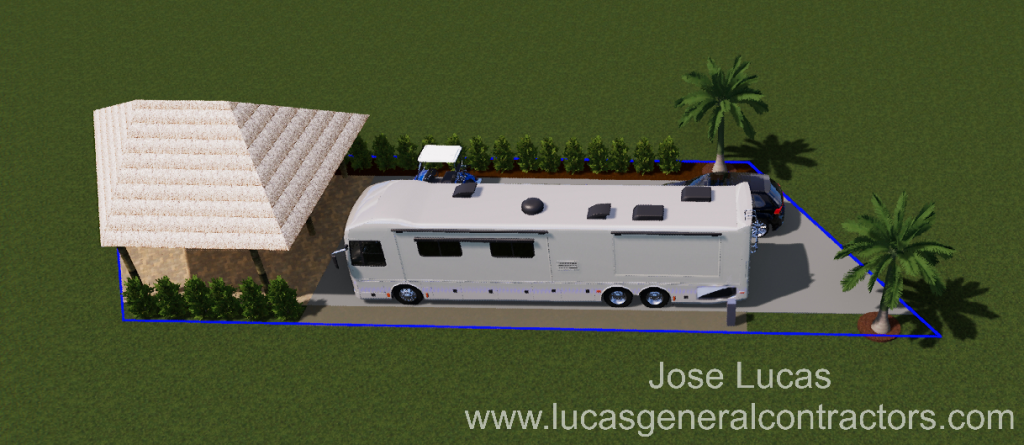
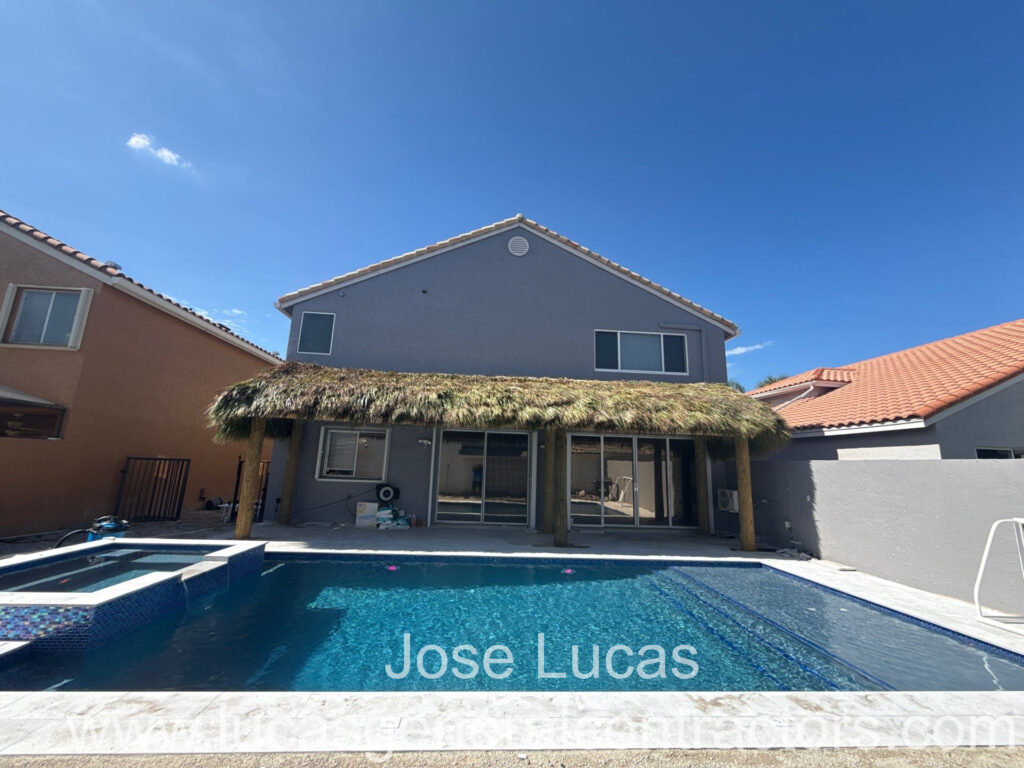
Pair décor with the right footprint—browse the Design Albums,
or Get a Quote when you’re ready to build or expand.
Safety note: Keep high-heat and open-flame items well away from the roof and posts. Favor LED candles and enclosed lanterns.